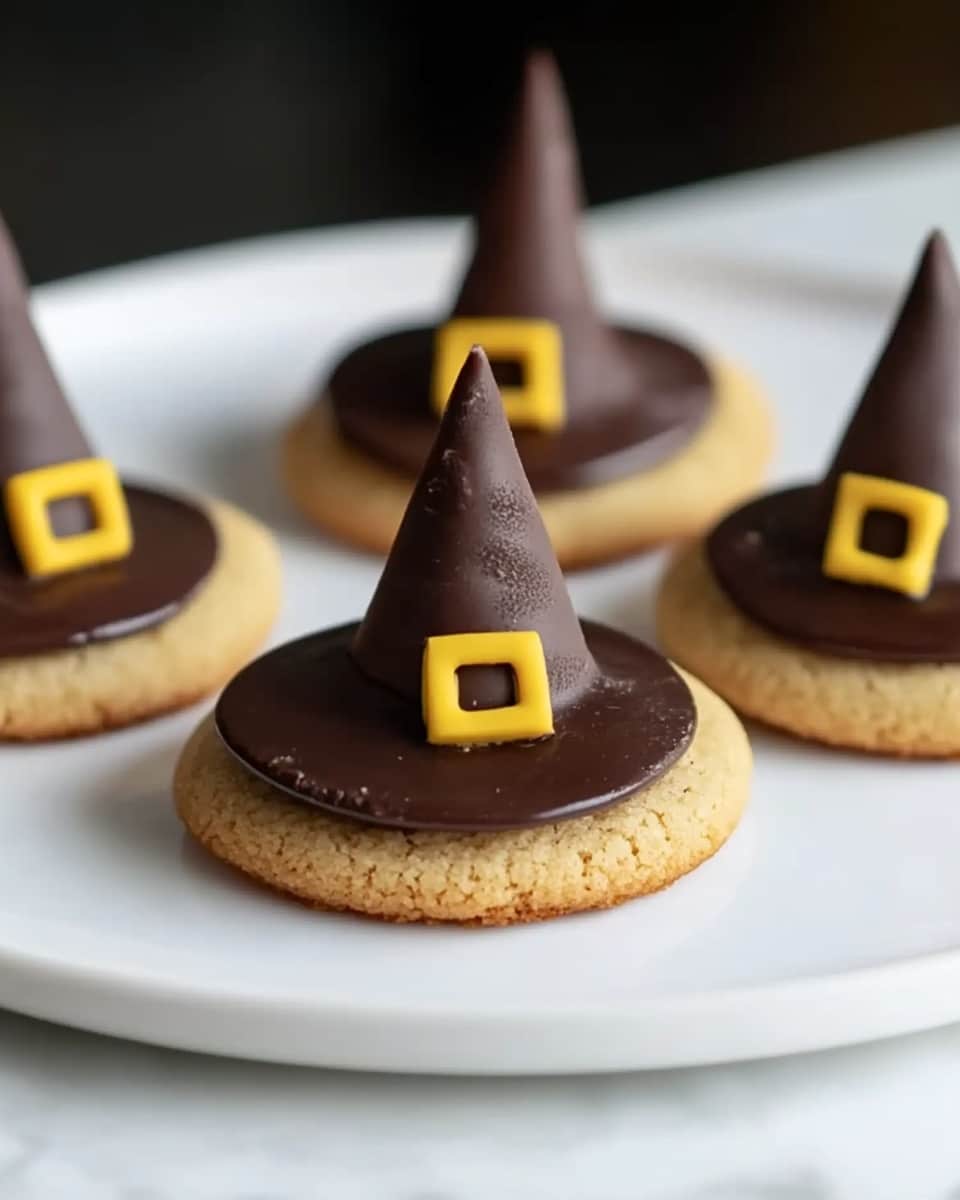
Witches’ Hats Cookie Treats Recipe
Okay, friends, if you’re looking for a super fun, super easy Halloween treat that looks totally magical, this Witches’ Hats Cookie Treats Recipe has got you covered! I remember making these last year for my Halloween party and watching everyone’s eyes light up the second they saw them. It’s amazing how just a few ingredients can come together to create such a charming—and delicious—snack that’s as cute as it is tasty.
What I love most about this Witches’ Hats Cookie Treats Recipe is how quick it is, but it still feels like you put in a ton of effort. Perfect for last-minute party prep or even just a weekend kitchen adventure with the kids. Plus, these treats offer that perfect mix of crunchy, sweet, and melty chocolate that just hits the spot every time.
Ingredients You’ll Need
These ingredients work beautifully together to give you that authentic “witches’ hat” look and a delightful flavor combo. When shopping, look for fudge stripe cookies with clear chocolate stripes and good-quality milk chocolate kisses for the best melt and shine.
- Fudge stripe cookies: These are the “hat brims,” so choose sturdy cookies that hold their shape well and have the classic chocolate stripes for that authentic look.
- Honey: Honey works as the “glue” here because it’s naturally sticky but won’t mess with the cookie texture.
- Milk chocolate candy kisses: Use good-quality candy kisses for smooth meltability and that classic hat cone shape.
- Decorating gel: This is the magic finishing touch to add your own flair with colorful details on the hatbands.
Variations
Feel free to put your own spin on this Witches’ Hats Cookie Treats Recipe! I like to switch up the decorating gel colors depending on the season or party theme, and sometimes swap the milk chocolate kisses for dark chocolate if I want something a little richer.
- Variation: You can try white chocolate candy kisses for a snowy witch hat look—perfect for a wintery-themed party. I did this once and had kids swooning over how unique they looked!
- Dietary modification: If you need gluten-free options, look for gluten-free cookies and enjoy the same fun without compromise.
- Seasonal twist: Add small edible glitter or candy eyes to turn the hats into spooky characters—kids adore this playful touch.
How to Make Witches’ Hats Cookie Treats Recipe
Step 1: Get your cookie brims ready
Start by laying out your fudge stripe cookies on a clean surface or a baking sheet. These cookies are perfect because their chocolate stripes already give the look of a “hat brim.” Double-check that your cookies aren’t cracked—it’ll make assembling trickier. This step is all about setting a solid foundation for your hats.
Step 2: Stick the “cone” on top with honey
Use about a teaspoon of honey on the back of each milk chocolate candy kiss to act as your “hat cone” glue. Press the kiss firmly but gently onto the center of each cookie brim. Don’t squeeze too hard or you might crack the cookie! The honey sets quickly but leaves a slight stickiness that holds everything together perfectly.
Step 3: Add your decorating gel finishing touches
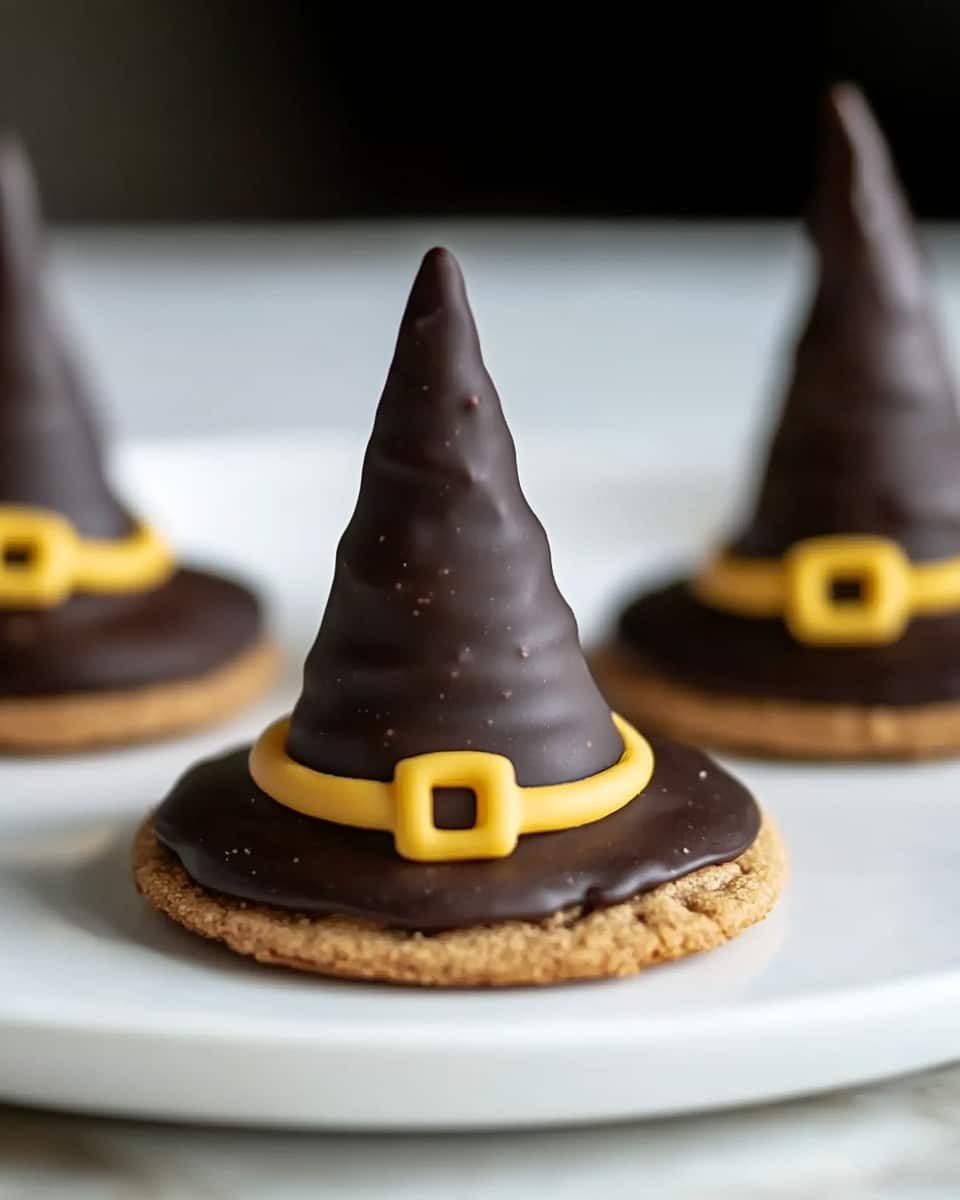
Once your cones are secured, it’s time for the fun part: decorating! Use the decorating gel to draw hatbands around the base of each candy kiss. I love using contrasting colors like orange or green to really make them pop. If you want to get fancy, create little dots or “buckles” for added character. Let the gel dry fully before moving your treats.
How to Serve Witches’ Hats Cookie Treats Recipe
Garnishes
I usually add a little sprinkle of edible glitter or finely chopped nuts around the plate when serving these Witches’ Hats Cookie Treats Recipe as a centerpiece. It gives a little festive shimmer that’s subtle but super charming. Plus, a few fresh mint leaves nearby brighten up the presentation nicely.
Side Dishes
Pair these treats with a warm drink—my go-to is a spiced apple cider or a rich cup of hot cocoa. The cozy beverages balance the sweet, chocolatey hats perfectly and make for a lovely autumn or Halloween snack spread.
Creative Ways to Present
For last year’s Halloween bash, I arranged the Witches’ Hats Cookie Treats Recipe on a black platter lined with orange tissue paper, then tucked in tiny plastic spiders for a fun spooky vibe. I also love stacking them tiered on a cake stand like little hats waiting to be picked. It makes a beautiful focal point and invites guests to dig in easily.
Make Ahead and Storage
Storing Leftovers
I keep leftover Witches’ Hats Cookie Treats Recipe in an airtight container at room temperature, and they stay fresh for about 3 days. Just make sure to keep them away from heat or moisture or the candy kisses might get a bit sticky.
Freezing
While I haven’t tried freezing the assembled treats, I usually freeze the cookies and candy kisses separately if I’m prepping ahead. Assemble once everything is thawed to keep the textures intact. If you do freeze whole hats, wrap them carefully and thaw gently to avoid condensation.
Reheating
These are best enjoyed as-is—no reheating needed! If you want the chocolate kisses a little melty, a quick 5-second zap in the microwave usually does the trick. Just be careful not to overdo it, or the honey glue could get runny.
FAQs
-
Can I use different types of cookies for the base?
Absolutely! While fudge stripe cookies offer a perfect “hat brim” look with their stripes, you can experiment with other round, sturdy cookies. Just make sure the cookies are firm enough to hold the chocolate cone without breaking.
-
What if I don’t have honey on hand?
You can substitute honey with corn syrup or even a bit of melted chocolate to act as a glue. Just keep in mind that honey’s stickiness and flavor work best for this Witches’ Hats Cookie Treats Recipe.
-
How long do Witches’ Hats Cookie Treats last?
Stored properly in an airtight container, they stay fresh for about 3 days at room temperature. Avoid storing in humid areas to keep the cookies crisp.
-
Can kids help make this recipe?
Definitely! This is one of those fun, hands-on recipes that kids really enjoy. Just supervise when handling the honey and ensure the kisses are pressed gently to prevent breakage.
-
Any tips for decorating the hats creatively?
Try using different colored decorating gels to add variations like stripes, polka dots, or little buckles. You can also sprinkle edible glitter or add tiny candy decorations to personalize each hat.
Final Thoughts
Honestly, this Witches’ Hats Cookie Treats Recipe holds a special place in my heart because it’s one of those simple, joyful projects that turn into instant party favorites. I love how it invites you to be playful with decorating while still being totally accessible. Give it a try next season—or even just for a fun weekend treat—you won’t regret having these little witches casting their sweet spells in your kitchen!
PrintWitches’ Hats Cookie Treats Recipe

Witches’ Hats are a fun and festive Halloween treat featuring fudge stripe cookies topped with a milk chocolate candy kiss and decorated with honey and gel to look like whimsical witch hats. These no-bake delights are quick to assemble, making them perfect for holiday parties or themed gatherings.
- Prep Time: 15 minutes
- Cook Time: 0 minutes
- Total Time: 15 minutes
- Yield: About 6 dozen witches’ hats (depending on size of cookies)
- Category: Dessert
- Method: No-Cook
- Cuisine: American
Ingredients
Base
- 2 (16 ounce) packages fudge stripe cookies
Adhesive
- ¼ cup honey, or as needed
Topping
- 1 (9 ounce) bag milk chocolate candy kisses, unwrapped
- 1 (4.5 ounce) tube decorating gel
Instructions
- Prepare adhesive: Warm the honey slightly if it is too thick, making it easier to use as an edible glue.
- Attach candy kisses: Dab a small amount of honey onto the flat side of a fudge stripe cookie, then gently press a milk chocolate candy kiss onto it to form the point of the hat.
- Allow set up: Place the assembled witches’ hats on a tray or plate, letting the honey adhesive slightly set so the candy kiss stays securely attached.
- Decorate hats: Using the decorating gel, carefully draw hat bands or other Halloween-themed designs around the base of each candy kiss to add character and charm.
- Serve and enjoy: Once decorated and set, serve your witches’ hats immediately or store them in an airtight container until ready to enjoy.
Notes
- If honey is too sticky, warming it a few seconds in the microwave can help with easier application.
- Decorating gel colors can be mixed for more personalized designs.
- Store finished hats at room temperature in an airtight container to keep cookies crisp.
- These treats do not require baking, making them quick and simple for last-minute parties.
- Substitute mint or dark chocolate candy kisses for variety.