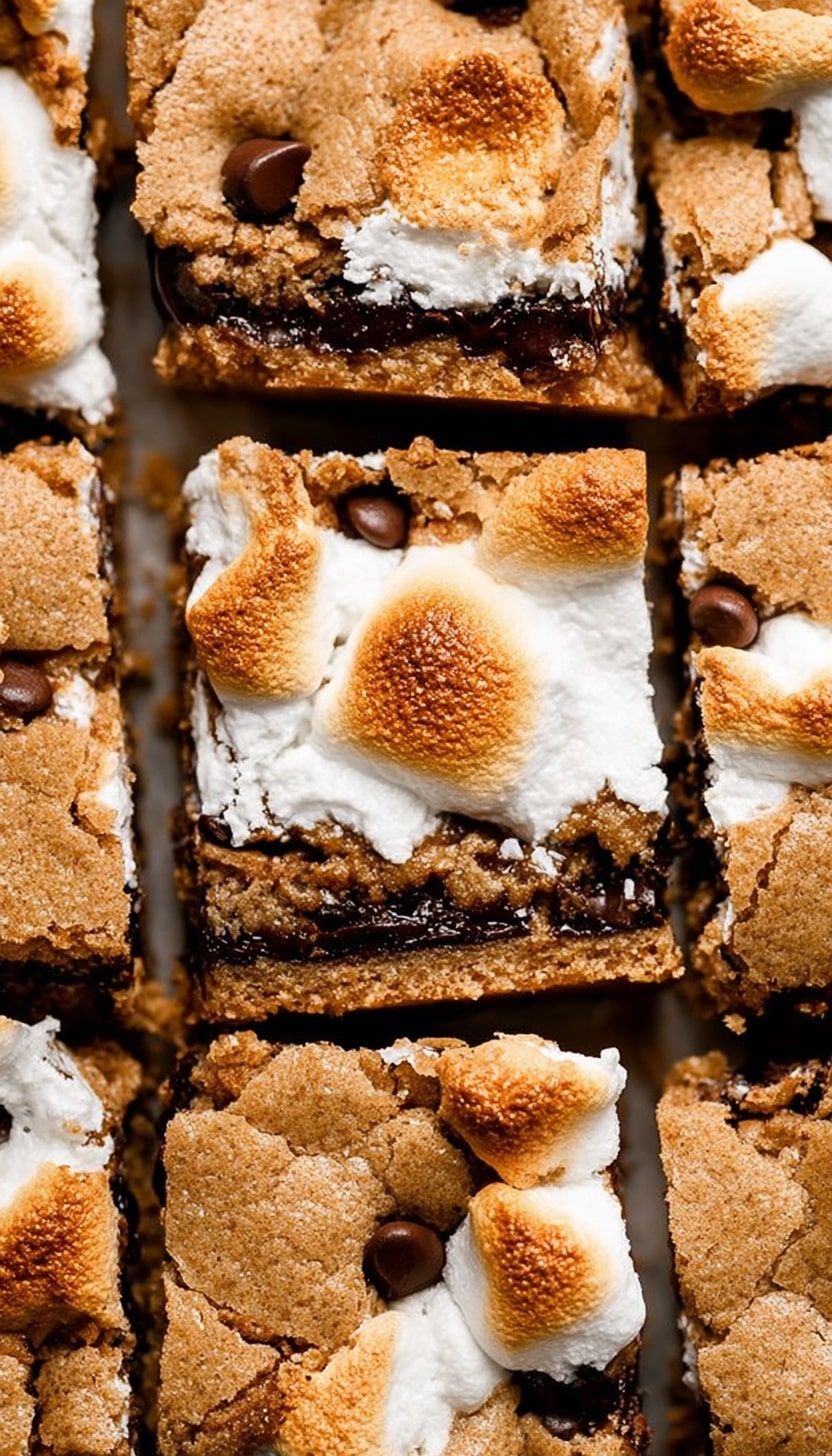
S’mores Cookie Bars Recipe
Oh, if you love all things s’mores but want something a little easier to enjoy indoors, this S’mores Cookie Bars Recipe is absolutely a game-changer. It brings together the perfect balance of crunchy graham crackers, melty chocolate, and that luscious marshmallow creme in a chewy, buttery cookie form that you’ll want to make again and again. Honestly, whenever I make these bars, it feels like having a summer campfire treat without ever leaving my kitchen.
These bars work so well for casual get-togethers, last-minute dessert cravings, or even to pack in lunches for a sweet surprise. What I really appreciate is how quick and straightforward the recipe is, yet you get all that nostalgic s’mores magic wrapped into each bite. You’re going to thank me when you realize just how irresistible these S’mores Cookie Bars are!
Ingredients You’ll Need
The beauty of these bars comes from simple, classic ingredients that come together beautifully. Each part plays its role perfectly—no fancy or hard-to-find items here, just pantry staples that make everything pop. Let me walk you through what you’ll want on hand and why.
- Unsalted butter: Softened just to room temperature so it blends effortlessly and adds that rich, moist texture.
- Brown sugar: I love how it gives a subtle molasses flavor that complements the graham crackers and chocolate perfectly.
- Egg: Helps bind everything while keeping the bars tender but sturdy.
- Vanilla extract: A splash adds a warm, sweet depth to the cookie base.
- All-purpose flour: The foundation of the cookie, spooned and leveled to ensure the right texture—too much flour and it gets dry!
- Graham cracker crumbs: You can crush about 8 full-sheet graham crackers yourself for the freshest taste, or buy pre-made crumbs.
- Baking powder: Just enough lift to keep bars from being too dense.
- Salt: Balances the sweetness and enhances all the flavors.
- Semi-sweet chocolate chips: I find semi-sweet balances the marshmallow sweetness better than milk chocolate, but you do you!
- Marshmallow creme: You can grab a jar of “Fluff” at the store or make a simple homemade version—it’s the melty heart of these bars.
Variations
I like to switch things up depending on the mood or who’s eating these S’mores Cookie Bars. After all, a little twist here and there keeps everyone excited and lets you make it your own. Don’t be afraid to experiment!
- Use white chocolate chips instead of semi-sweet: I tried this once for a party, and the creamy sweetness paired surprisingly well with the graham and marshmallow.
- Gluten-free twist: Swap the all-purpose flour with a 1:1 gluten-free baking blend; just check your graham cracker crumbs are GF too.
- Extra gooey marshmallow: Spread a layer of mini marshmallows on top halfway through baking for that charred, melty effect.
- Add chopped nuts: Pecans or walnuts give a nice crunch and depth—great if you want to add texture and a nutty flavor.
How to Make S’mores Cookie Bars Recipe
Step 1: Cream the butter and sugar until fluffy
Start by beating the softened butter and brown sugar together until you see a light and creamy mixture—this usually takes about 3-4 minutes on medium speed. This step is crucial because it traps air, giving your bars a soft and tender crumb. If you skip or underdo it, the texture can turn out denser than you want.
Step 2: Add egg and vanilla, then mix dry ingredients
Beat in the egg and vanilla extract until everything’s smooth and combined. In a separate bowl, whisk together your flour, graham cracker crumbs, baking powder, and salt. This keeps the dry ingredients evenly distributed before folding them in.
Step 3: Combine wet and dry ingredients, then add chocolate chips
Gently fold the dry mix into your wet mixture until just combined—don’t overmix or you’ll toughen the bars. Toss in your chocolate chips and stir them through evenly; getting them throughout means every bite has that melty chocolate surprise.
Step 4: Press half the dough into a lined pan, spread marshmallow creme, then top
Use a square baking pan lined with parchment paper to make clean cuts later. Press half of your cookie dough evenly on the bottom—don’t skimp on this step for a sturdy base. Next, spread your marshmallow creme gently but thoroughly so it covers the whole layer. Finally, crumble the remaining dough on top; it doesn’t have to be perfect, that crumbly top is what makes these bars special.
Step 5: Bake and watch for that perfect golden top
Bake at 350°F (175°C) for about 25-28 minutes. Keep an eye on it—the top should be golden brown but not burnt. Since the bars have marshmallow inside, you want the edges to set without losing that gooey center. I usually check around 24 minutes to avoid overdoing it.
Step 6: Cool completely before slicing
This one’s important! Let the bars cool fully in the pan to let the marshmallow layer set—it’ll firm up a bit so you get clean slices instead of a gooey mess. If you’re impatient like me, pop the pan in the fridge for 20 minutes after cooling on the counter; that helps too.
How to Serve S’mores Cookie Bars Recipe
Garnishes
I like to keep it simple with these bars because they’re already loaded with flavor. Sometimes I sprinkle a tiny pinch of flaky sea salt on top right after baking—trust me, it makes the chocolate and marshmallow flavors pop like nothing else. For special occasions, a light dusting of powdered sugar adds a pretty touch that’s easy and elegant.
Side Dishes
If you’re serving these at a party or dessert buffet, I love pairing them with vanilla ice cream or fresh berries to cut through the sweetness. A hot cup of coffee or rich hot chocolate alongside these bars is basically heaven, especially on a chilly evening.
Creative Ways to Present
For birthdays or holidays, I’ve layered these bars in a clear trifle dish with whipped cream and crushed graham crackers for a show-stopping s’mores parfait. Another time, I cut the bars into bite-size squares and served them on a wooden platter with little skewers, perfect for a casual get-together where folks can just grab and go.
Make Ahead and Storage
Storing Leftovers
These bars keep wonderfully in an airtight container at room temperature for up to 3 days—though honestly, they rarely last that long in my house! Just make sure they’re fully cooled before storing to avoid condensation making them soggy. If your kitchen is humid, I’d personally go for refrigeration.
Freezing
I’ve frozen leftover bars wrapped tightly in plastic wrap and then foil for up to 2 months. When you’re ready to enjoy them, just thaw overnight in the fridge and they taste almost as fresh as day one. Freezing is a lifesaver if you want to prep ahead for parties or just keep some treats on hand.
Reheating
If you prefer warm bars, reheat individual servings in the microwave for 10-15 seconds—watch that marshmallow so it doesn’t puff up too much. For a larger portion, a quick 5-minute warm-up in a 300°F oven does the trick nicely without drying them out.
FAQs
-
Can I use regular marshmallows instead of marshmallow creme in this S’mores Cookie Bars Recipe?
You can, but the texture will be different. Marshmallow creme spreads smoothly creating a gooey middle layer, while mini marshmallows tend to puff and melt unevenly. If you want to use mini marshmallows, try sprinkling them on top halfway through baking for a toasted effect instead.
-
How do I prevent the marshmallow layer from spilling over during baking?
Press the bottom cookie dough layer firmly and evenly and spread the marshmallow creme gently but not too thick. Also, topping the marshmallow layer with the remaining dough acts like a seal to keep it contained. Baking at the right temperature (around 350°F) helps everything set properly without bubbling over.
-
Can I make this recipe vegan?
Absolutely, it just takes some substitutions. Use vegan butter and egg replacer (like flax or chia eggs), make sure your chocolate chips are dairy-free, and find a vegan marshmallow creme alternative or make a homemade version that’s egg-free. It won’t be 100% the same, but still delicious!
-
What pan size is best for baking S’mores Cookie Bars Recipe?
I use a 9×9-inch square pan lined with parchment for easy lifting and neat cuts. A similarly sized pan like an 8×8-inch will work, but you may need to adjust baking times slightly since the bars will be thicker.
-
Can I double the recipe for a bigger batch?
Yes! Just double all ingredients and bake in a 9×13-inch pan. Keep an eye on baking time, as it may take a few extra minutes. Test by inserting a toothpick; it should come out with moist crumbs but no raw batter.
Final Thoughts
This S’mores Cookie Bars Recipe holds a special place in my recipe box because it’s like the comfort of campfire treats paired with the simplicity of homemade cookies. Whenever I whip up a batch, it brings back cozy memories and smiles from anyone who tries them. I can’t wait for you to enjoy these bars as much as I do—give them a go next time you want that perfect blend of nostalgia and easy baking magic!
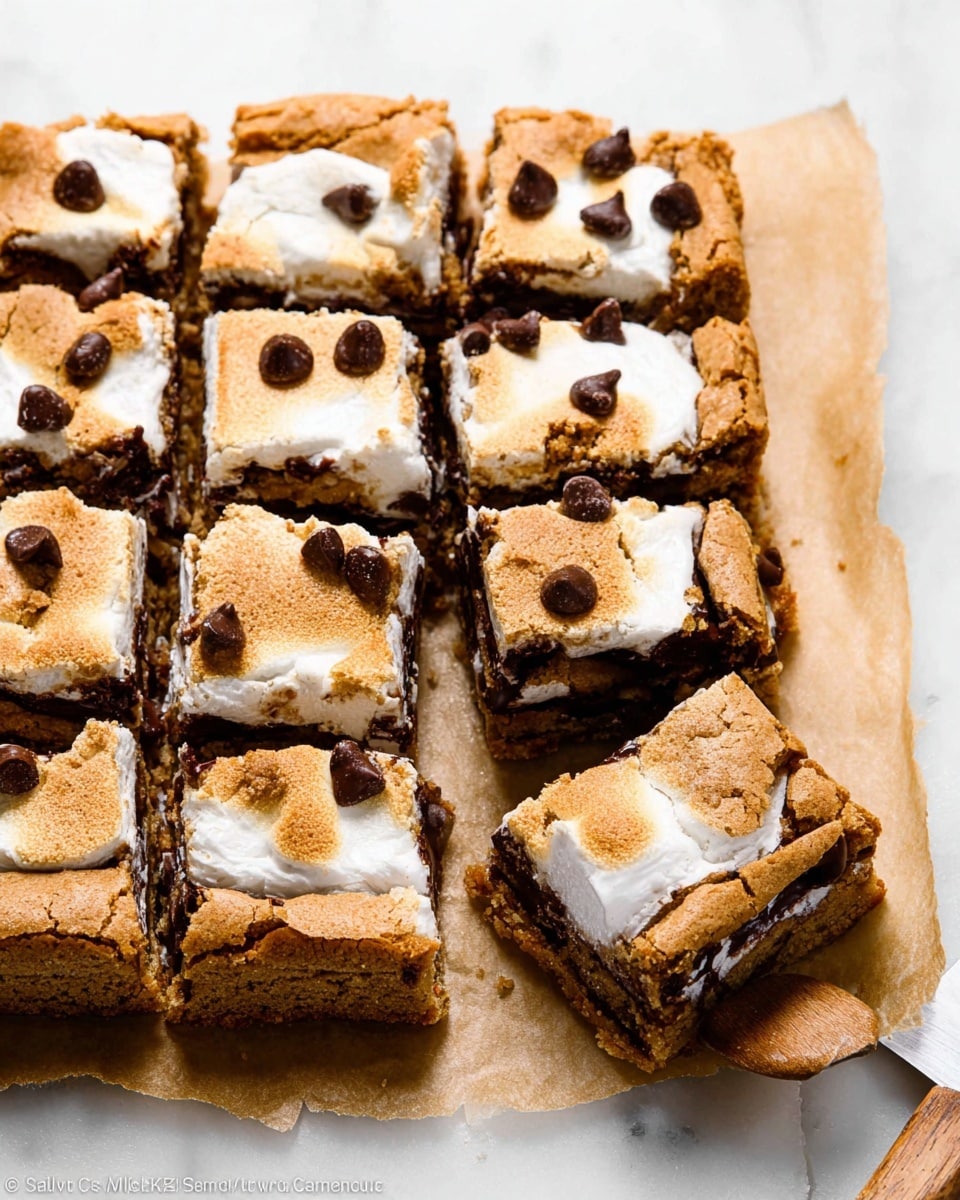
PrintS’mores Cookie Bars Recipe
These S’mores Cookie Bars combine all the nostalgic flavors of classic s’mores in an easy-to-make bar form. Soft and chewy with a buttery base, crunchy graham cracker crumbs, rich semi-sweet chocolate chips, and a luscious layer of marshmallow creme, these bars are perfect for satisfying your sweet tooth without the need for a campfire.
- Prep Time: 15 minutes
- Cook Time: 25 minutes
- Total Time: 1 hour 40 minutes
- Yield: 16 bars
- Category: Dessert
- Method: Baking
- Cuisine: American
Ingredients
Cookie Base
- 1/2 cup (8 Tbsp; 113g) unsalted butter, softened to room temperature
- 3/4 cup (150g) packed light or dark brown sugar
- 1 large egg, at room temperature
- 1 teaspoon pure vanilla extract
- 1 cup (125g) all-purpose flour (spooned & leveled)
- 1 cup (120g) graham cracker crumbs (about 8 full-sheet graham crackers)
- 1/2 teaspoon baking powder
- 1/4 teaspoon salt
- 1 cup (180g) semi-sweet chocolate chips
Marshmallow Layer
- 1 heaping cup marshmallow creme (store-bought “Fluff” or 1/2 recipe of homemade marshmallow creme)
Instructions
- Preheat Oven: Preheat your oven to 350°F (175°C). Grease or line a 9×9-inch baking pan with parchment paper for easy removal.
- Mix Butter and Sugar: In a large bowl, cream together the softened unsalted butter and packed brown sugar until the mixture is light and fluffy. This provides the rich, buttery base for the cookie bars.
- Add Egg and Vanilla: Beat in the large egg and vanilla extract until fully combined, ensuring a smooth batter.
- Combine Dry Ingredients: In a separate bowl, whisk together the all-purpose flour, graham cracker crumbs, baking powder, and salt. This blend adds texture and flavor reflective of traditional s’mores.
- Incorporate Dry Ingredients: Gradually add the dry mixture to the wet ingredients. Stir until just combined; do not overmix to maintain a tender texture.
- Fold in Chocolate Chips: Gently fold in the semi-sweet chocolate chips evenly throughout the batter.
- Spread Batter: Evenly spread the cookie dough into the prepared baking pan, smoothing the top with a spatula.
- Bake: Bake in the preheated oven for 20-25 minutes, or until the edges are golden and the center is set but still soft.
- Add Marshmallow Layer: Remove the pan from the oven and immediately spread the marshmallow creme evenly over the hot cookie base. The heat will help it melt slightly for a gooey finish.
- Cool and Set: Allow the bars to cool completely at room temperature, then refrigerate for at least 1 hour to let the marshmallow layer firm up.
- Slice and Serve: Once chilled and set, use a sharp knife to cut into bars. Serve and enjoy this indulgent s’mores-inspired treat!
Notes
- For homemade marshmallow creme, there are simple recipes available that use egg whites and sugar if you want to avoid store-bought products.
- Make sure the butter is softened to room temperature for easier mixing and a smoother batter.
- You can substitute semi-sweet chocolate chips with milk chocolate or dark chocolate based on preference.
- For extra gooey bars, add an additional 1/4 cup of marshmallow creme on top before chilling.
- Store leftovers in an airtight container in the refrigerator for up to 5 days.
- Allow bars to come to room temperature before serving for best texture.