
No-Knead Focaccia Recipe
I’m so excited to share my favorite No-Knead Focaccia Recipe with you because it’s honestly a game-changer for anyone who loves fresh bread but isn’t always in the mood to spend time kneading dough. This bread comes out beautifully airy and full of those classic dimples that just scream “artisan,” yet it’s incredibly simple to make. You only need a few pantry staples and a bit of patience for the rising, but the payoff? Pure golden, crispy-on-the-outside, soft-on-the-inside perfection that I guarantee will impress at any meal.
No-knead focaccia works wonderfully for a casual dinner, sandwich bread, or as an appetizer with dips. I especially love making it on a lazy weekend afternoon when I can let the dough do its thing while I relax with a book. Plus, the simplicity means you don’t have to be a bread expert to pull it off — you’ll enjoy the process and the taste without breaking a sweat.
Ingredients You’ll Need
These ingredients come together to create a dough that’s perfectly balanced with just the right saltiness and olive oil richness to get that wonderful focaccia texture. Make sure your yeast is fresh for the best rise!
- Warm water: Use about 100°F water—warm to the touch but not hot—to activate the yeast properly without killing it.
- Sugar: Just a tablespoon to give the yeast a little food to wake up and start bubbling.
- Sea salt (not table salt): This gives better flavor and a nice crunch if sprinkled on top later.
- Instant dry yeast: This works great for no-knead recipes since it activates quickly without needing proofing. If you have active dry yeast, you can yes, just proof it first in warm water.
- Olive oil: A tablespoon folded right into the dough plus a drizzle on top for that classic richness and crisp edges.
- Bread flour: The higher protein flour helps create the structure and chewy crumb you want in focaccia. All-purpose flour will work, but the texture will change slightly.
Variations
I’ve found this No-Knead Focaccia Recipe is a fantastic blank canvas, so I encourage you to make it your own. Adding herbs or toppings can really elevate it depending on your mood or the season.
- Rosemary and sea salt: My go-to combo—I sprinkle fresh rosemary needles and a bit of flaky sea salt on top just before baking, and it smells incredible.
- Garlic and Parmesan: Mix minced garlic in with the olive oil before drizzling and top with freshly grated Parmesan for a savory twist.
- Cherry tomatoes and olives: Press halved cherry tomatoes and olives into the dough before baking for a Mediterranean vibe.
- Gluten-free version: I’ve experimented with gluten-free flours but found you’ll need a blend and extra hydration to get a similar texture.
How to Make No-Knead Focaccia Recipe
Step 1: Mix and Let It Rise
Start by dissolving the sugar and yeast in warm water and let it sit for a few minutes until it’s bubbly and alive—that’s your sign the yeast is working. Then add in the bread flour, sea salt, and olive oil, stirring everything together with a wooden spoon or your hands until there are no more dry bits. This dough will be wet and sticky, which is exactly what you want. Cover the bowl with plastic wrap or a clean towel, and let it rise in a warm spot for about 1 to 2 hours or until doubled in size. The no-knead part really frees you up here, so go relax during this step—I promise the dough will thank you!
Step 2: Shape the Dough in the Pan
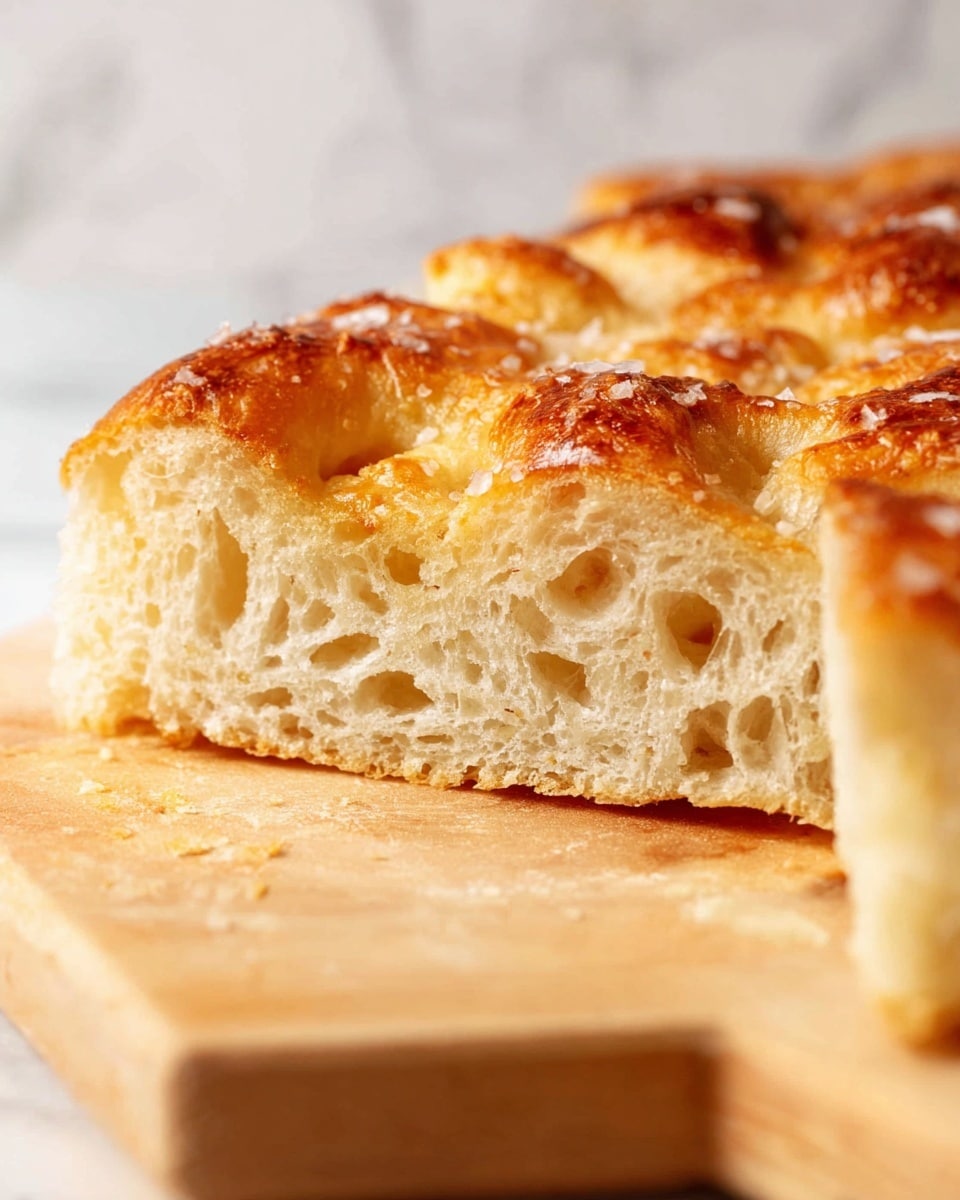
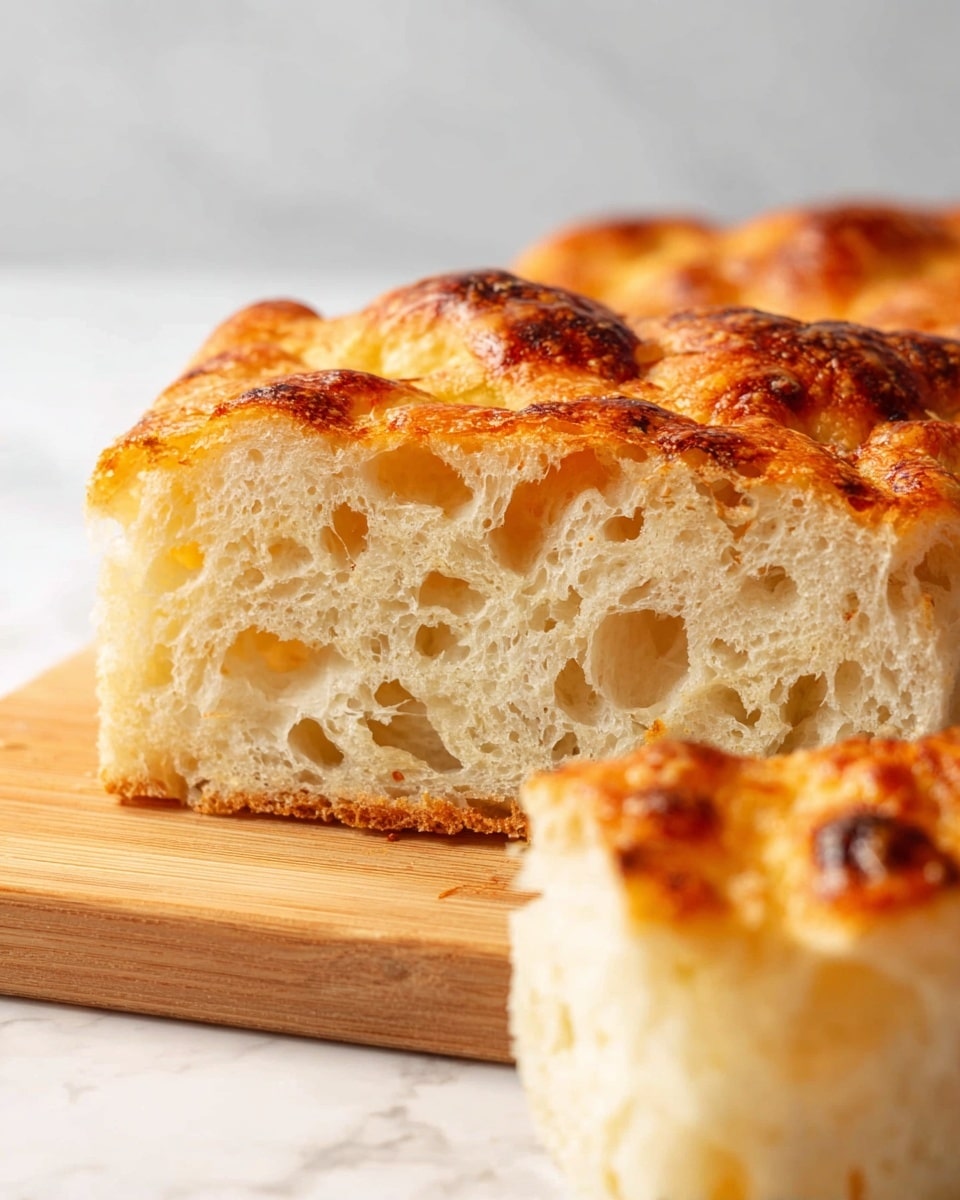
Once doubled, generously oil a baking sheet or a large cast iron skillet to prevent sticking and add flavor. Use your fingers to transfer the dough gently to the pan, stretching it out with lightly oiled hands into a rough rectangle or circle, depending on your pan’s shape. You’ll probably need to let it rest a few more minutes to relax and keep stretching gently without tearing. Then, use your fingertips to dimple the surface, pressing down all over to create those signature focaccia pockets that trap oil and seasoning.
Step 3: Drizzle, Season, and Final Rise
Drizzle a good amount of olive oil over the dough, making sure some pools in those little dimples. Sprinkle with a pinch of sea salt and add any optional herbs or toppings you like. Let the dough rest for another 30 to 45 minutes so it puffs up just a bit more before baking. This step is key for that light, airy crumb.
Step 4: Bake Until Golden
Preheat your oven to 220°C (425°F). Pop the focaccia in the oven and bake for about 20 to 25 minutes until it’s golden brown and crispy on the edges. If you have a kitchen thermometer, the internal temperature should hit around 200°F. Once out of the oven, let it cool slightly before slicing so the crumb sets nicely. The aroma while baking will have you hovering nearby, trust me!
How to Serve No-Knead Focaccia Recipe
Garnishes
I usually finish my focaccia with a sprinkle of flaky sea salt and freshly cracked black pepper. Fresh herbs like rosemary or thyme are my favorites, especially right out of the oven. Sometimes, I toss on tiny bits of garlic or even pomegranate seeds for a surprising sweet pop. These garnishes add flavor and that gourmet look.
Side Dishes
Nothing beats pairing this No-Knead Focaccia Recipe with a big, vibrant salad, like arugula with lemon vinaigrette, or a warm bowl of soup such as tomato basil or minestrone. I love serving slices alongside a cheese board or charcuterie for casual gatherings, too — everyone sneaks in with their fingers before dinner’s even served!
Creative Ways to Present
For a special occasion, I try dividing the dough into mini focaccias that I top with different fresh herbs, olives, or sun-dried tomatoes—great for guests who want to try a few flavors. Another fun idea is to cut the focaccia into sticks and serve with flavored olive oils for dipping, turning it into a casual appetizer that everyone loves.
Make Ahead and Storage
Storing Leftovers
I wrap leftover focaccia tightly in aluminum foil or place it in an airtight container at room temperature. It usually stays fresh and soft for up to 2 days, but I find enjoying it on day one is best — that crispness is unmatched!
Freezing
Freezing focaccia is a lifesaver when you want to prepare ahead. I slice it first, then layer the pieces between parchment paper in a freezer-safe bag. When you want some, just pop the slices straight into the toaster or oven — it comes back almost like fresh.
Reheating
To bring back that fresh-from-the-oven softness and crisp edges, I heat leftover focaccia in a preheated oven at 180°C (350°F) for about 5 to 7 minutes. Wrapping it loosely in foil helps it stay moist if you prefer it softer. Microwave is quick but tends to make it chewy, so I only use that method in a pinch.
FAQs
-
Can I use all-purpose flour instead of bread flour for this No-Knead Focaccia Recipe?
Yes, you can substitute all-purpose flour if that’s what you have. The focaccia will still be delicious but may have a slightly softer texture and less chew compared to bread flour which has higher protein content helping gluten development.
-
What if I don’t have instant yeast? Can I use active dry yeast?
Absolutely! If using active dry yeast, dissolve it in the warm water with sugar first and let it sit until bubbly before mixing with flour. This step isn’t necessary with instant yeast as it can be mixed directly.
-
How long can I let the dough rise for this recipe?
I recommend 1 to 2 hours for the initial rise until doubled, then another 30 to 45 minutes once shaped. However, you can also do a slower rise by refrigerating the dough overnight, which enhances flavor and texture in a way that’s worth trying.
-
Can I make this focaccia gluten-free?
Gluten-free focaccia is trickier due to the structure gluten provides, but you can experiment with gluten-free bread flour blends and add xanthan gum to mimic the stretch and chew. Expect a slightly different texture but still tasty!
-
How should I store leftovers to keep them fresh?
Wrap focaccia tightly in foil or place in an airtight container at room temperature. It’s best eaten within 2 days, but freezing sliced pieces extends the shelf life quite well.
Final Thoughts
This No-Knead Focaccia Recipe has become my bread baking go-to whenever I want something impressive but simple. It’s forgiving, delicious, and perfect for everyday occasions or guests dropping by unexpectedly. Trust me, once you’ve tried making it yourself, you’ll feel so proud slicing it fresh from the oven. I can’t wait for you to enjoy it as much as I do—and if you ever need a little bread-baking cheerleader, I’m right here cheering you on!
PrintNo-Knead Focaccia Recipe

This No-Knead Focaccia recipe is a simple, foolproof method to create a delicious, airy, and golden Italian flatbread with minimal effort. Using instant dry yeast and longer fermentation times, it develops a perfect chewy texture and wonderful crust, ideal as a side, sandwich bread, or base for toppings.
- Prep Time: 15 minutes
- Cook Time: 25 minutes
- Total Time: 13 hours 40 minutes
- Yield: 1 large focaccia (approximately 8 servings)
- Category: Bread
- Method: Baking
- Cuisine: Italian
Ingredients
Primary Ingredients
- 500 ml warm water
- 1 Tablespoon sugar
- 1 Tablespoon sea salt (NOT table salt)
- 2 teaspoons instant dry yeast (see note below if using active dry yeast)
- 1 Tablespoon olive oil
- 550 grams bread flour
Instructions
- Mix Ingredients: In a large mixing bowl, combine the warm water, sugar, sea salt, instant dry yeast, olive oil, and bread flour. Stir together until all ingredients are fully incorporated and a wet, sticky dough forms.
- First Rise: Cover the bowl tightly with plastic wrap or a damp towel and let the dough rise in a warm place for approximately 12 to 18 hours. The dough should inflate and develop bubbles indicating fermentation.
- Prepare Baking Pan: Drizzle olive oil into a large baking sheet or rectangular pan, ensuring the bottom is well coated to prevent sticking.
- Shape Dough: Using floured hands, transfer the dough onto the oiled pan. Gently spread the dough out to cover the surface, being careful not to deflate it too much. Create dimples by pressing fingertips into the dough surface.
- Second Rise: Cover the pan and let the dough rise again for about 1 to 2 hours until puffy and nearly doubled.
- Bake: Preheat your oven to 220°C (425°F). Place the risen dough in the oven and bake for 20 to 25 minutes or until the focaccia is golden brown on top and crisp around the edges.
- Cool and Serve: Remove the focaccia from the oven and cool in the pan for 10 minutes, then transfer to a rack. Slice and enjoy plain or with your favorite toppings.
Notes
- If using active dry yeast, dissolve it first in warm water with the sugar and let it bloom for 5 to 10 minutes before mixing with the other ingredients.
- Sea salt is preferred over table salt for better flavor and texture.
- For an extra aromatic focaccia, consider adding herbs like rosemary or thyme on top before baking.