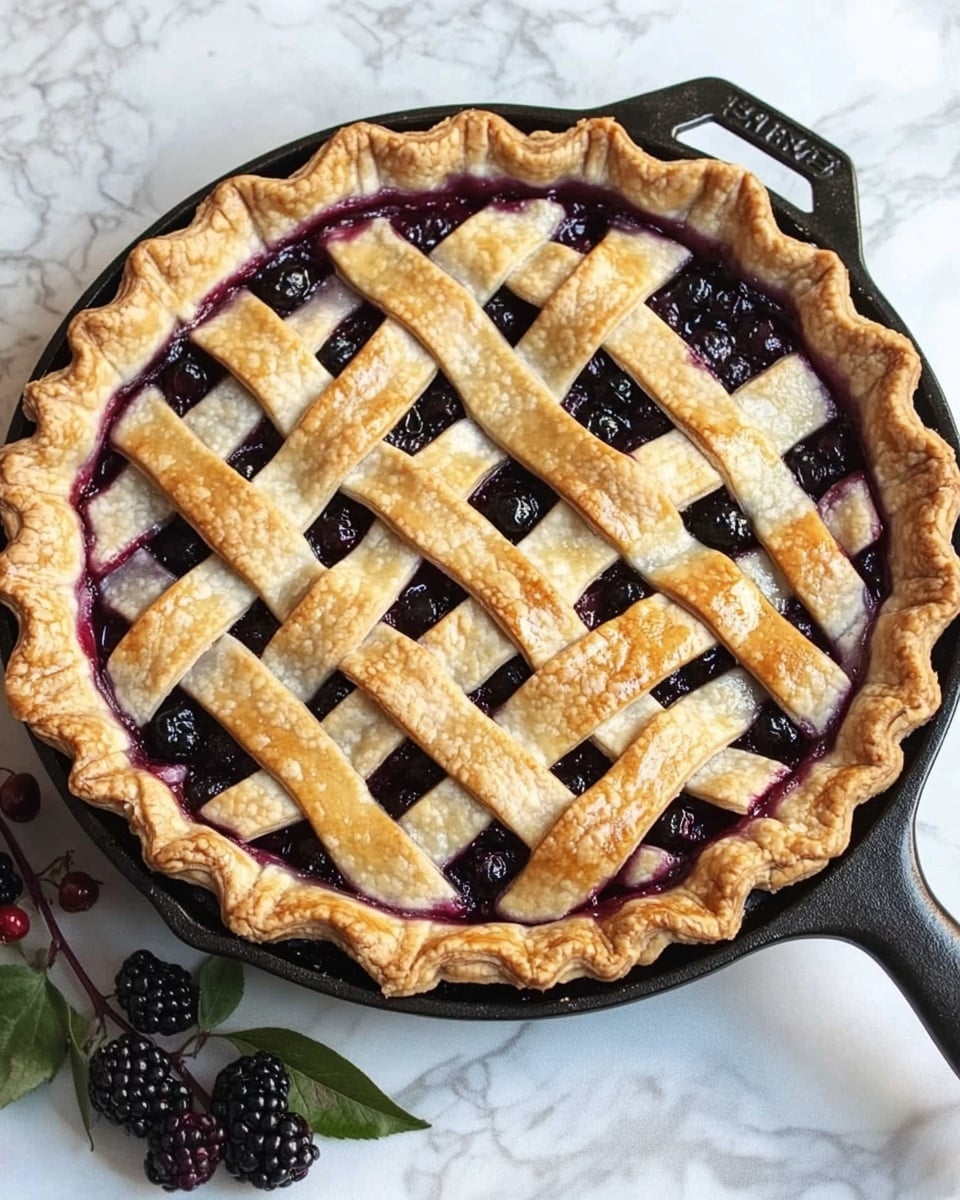
Elderberry Pie Recipe
There’s something truly magical about an elderberry pie that makes it stand out during the pie season. The deep, rich flavor of the elderberries combined with just the right balance of sweetness creates a dessert that’s both comforting and a little unexpected. I remember the first time I baked this elderberry pie recipe—it was a rainy Sunday, and the aroma filling my kitchen was instantly calming and inviting.
If you’re looking for a homemade dessert that’s a bit on the unique side but still totally irresistible, this elderberry pie recipe fits the bill perfectly. Whether it’s for a family gathering or simply a treat to enjoy on your own, this pie strikes the perfect chord between fruity tartness and buttery pastry. Trust me, once you try it, it’ll become one of your go-to recipes as it did mine!
Ingredients You’ll Need
Each ingredient in this elderberry pie recipe plays a key role in bringing that luscious flavor and perfect texture together. I find that shopping for fresh, ripe elderberries is crucial—they truly make the filling pop with flavor. And picking the right pie crust can save you a lot of hassle later on.
- Double-crust pie pastry: I usually grab a good-quality pre-made pastry from the fridge section, but homemade crust works beautifully too if you have the time.
- Elderberries: Fresh and ripe are best; if you can’t find them fresh, frozen works, but make sure to thaw and drain excess moisture.
- White sugar: Balances the natural tartness of elderberries; feel free to adjust based on your sweetness preference.
- Cornstarch: This is your thickening hero to keep the filling from turning runny as it bakes.
- Water: Just enough to mix with cornstarch for smooth thickening—don’t skip or overdo it!
- Lemon juice: Brightens the filling and enhances the natural berry flavor—fresh lemon juice always.
- Butter: Adds richness on top of the filling; a few pats dotted before sealing the crust make a big difference.
Variations
I’m a fan of personalizing recipes like this elderberry pie to better suit tastes or dietary needs. You can definitely play around with what you add or swap to make this pie your own signature dessert.
- Mixed Berry Variation: I’ve mixed elderberries with blueberries or blackberries to add complexity—especially great when elderberries are a bit tart.
- Gluten-Free Crust: Using a gluten-free pie crust made this recipe accessible for my gluten-sensitive friends without losing that flaky goodness.
- Reduced Sugar Version: Sometimes I cut back on sugar and add a splash of honey or maple syrup for a natural sweetness with deeper notes.
- Spice it Up: For a cozy twist, sprinkle a pinch of cinnamon or nutmeg into the filling; it’s my secret tip for fall gatherings.
How to Make Elderberry Pie Recipe
Step 1: Prep Those Elderberries Carefully
Start by thoroughly rinsing your elderberries to remove any stems or leaves—those little stems can be quite bitter and throw off the flavor. I like to remove the tiny stems one by one; it’s a bit tedious, but trust me, it’s worth the effort. Once cleaned, set them aside in a large bowl while you prepare the filling.
Step 2: Mix Up The Filling
In your bowl of elderberries, add the sugar, then mix the cornstarch with water separately until smooth before stirring that in. This prevents lumps and helps thicken your pie filling while baking. Finish with a good squeeze of fresh lemon juice—this helps lift the fruit’s vibrancy. Give it all a gentle toss so every berry is coated evenly.
Step 3: Assemble the Pie
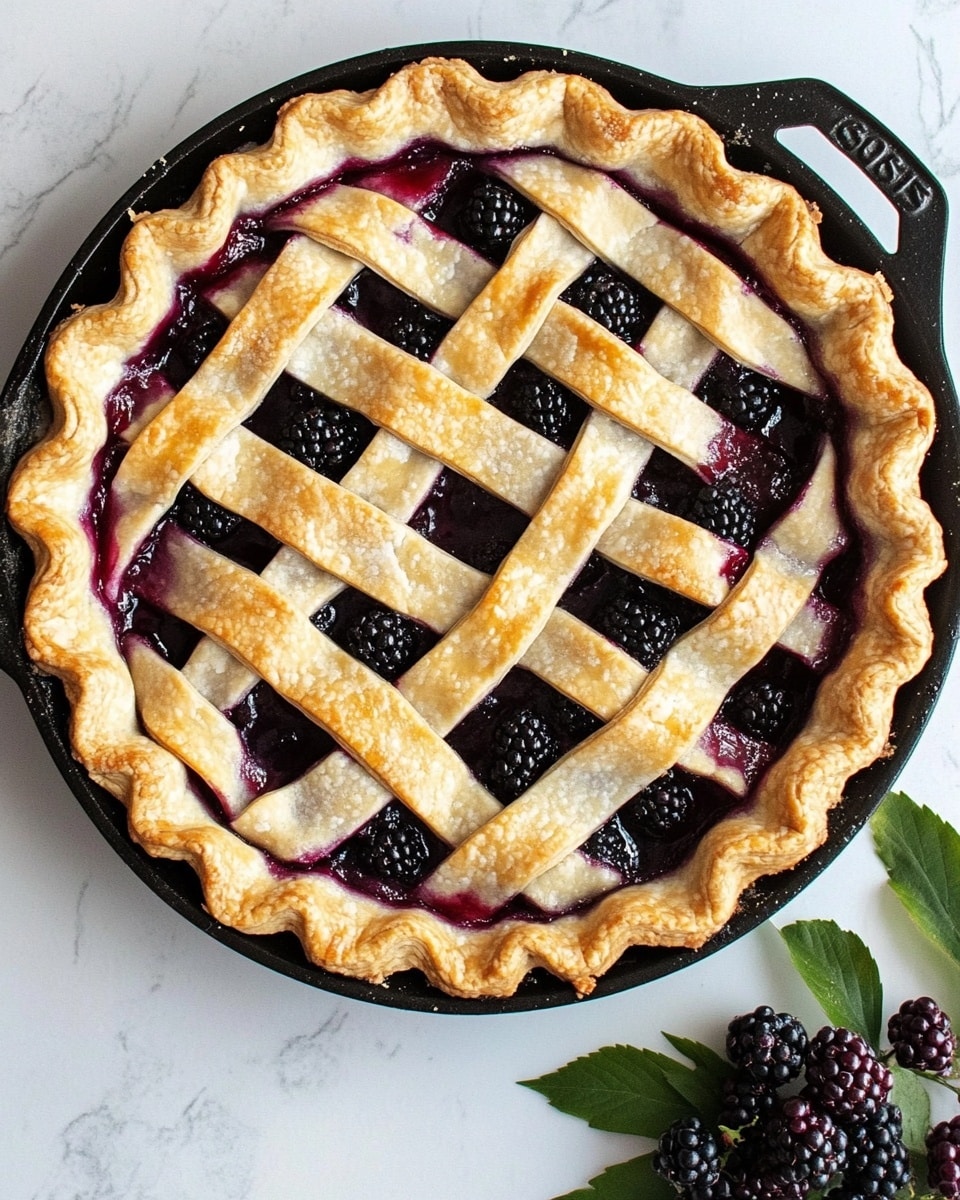
Roll out the bottom crust into your pie dish first. Pour the elderberry filling in, then dot with small chunks of butter across the top. This melt-in richness adds that lovely depth to the pie once baked. Lay the top crust over, crimp the edges to seal, and don’t forget to cut a few vent holes so steam escapes during baking, keeping your crust crisp.
Step 4: Bake Until Golden and Bubbling
Pop your pie into a preheated oven at 375°F (190°C). Baking time usually runs around 45-55 minutes, but I keep an eye out for that beautiful golden-brown crust and bubbling filling to know it’s ready. If the edges brown too quickly, a pie shield—or even foil—helps protect them until the center is perfectly cooked.
How to Serve Elderberry Pie Recipe
Garnishes
I love adding a simple scoop of vanilla ice cream or a dollop of freshly whipped cream right on top—it balances the tartness beautifully. Occasionally, I sprinkle a little powdered sugar or fresh mint leaves for a pop of color and freshness that makes every slice visually inviting.
Side Dishes
This pie pairs great with light, cozy side dishes. I often serve it alongside a warm cup of spiced tea or hot cider, especially in cooler months. A small cheese plate with sharp cheddar can also complement the sweet and tart notes if you want a savory touch to the dessert course.
Creative Ways to Present
For holidays or special dinners, I’ve made mini elderberry hand pies using the same filling—perfect for passing around at parties! You can also cut the top crust into fun shapes or lattice patterns to add an extra personal touch that guests always appreciate.
Make Ahead and Storage
Storing Leftovers
I store leftover elderberry pie tightly covered in the fridge. It usually keeps well for up to 3 days without losing much of its flavor or texture. Just bring it to room temperature or gently warm it before serving for the best taste.
Freezing
If you want to freeze it, I recommend wrapping slices individually in plastic wrap and foil to prevent freezer burn. When I’ve done this, the pie still tastes fresh and delicious months later—just thaw overnight in the fridge before reheating.
Reheating
To reheat, I pop a slice in a 350°F (175°C) oven for about 10-15 minutes. Microwaving works in a pinch, but the oven helps keep the crust nice and flaky without getting soggy.
FAQs
-
Can you use frozen elderberries for this elderberry pie recipe?
Absolutely! If fresh elderberries aren’t available, frozen ones work great. Just remember to thaw and drain any excess liquid before mixing the filling to avoid a watery pie.
-
Is elderberry pie safe to eat raw?
Raw elderberries can be toxic, so it’s important to cook them fully in the pie filling. Baking at the recommended temperature will ensure they’re safe and delicious.
-
How can I make the crust extra flaky?
Keep your pie dough cold, handle it as little as possible, and consider adding a bit of cold butter or shortening to the crust. Chilling the assembled pie before baking also helps retain flakiness.
-
What can I substitute for cornstarch if I don’t have any?
You can use arrowroot powder or tapioca starch as a thickening agent in place of cornstarch. Just use the same amount to keep your pie filling nicely set.
-
Can I make this elderberry pie recipe vegan?
Yes! Use a plant-based pie crust and substitute butter with a vegan alternative like coconut oil or vegan margarine. This way, the pie remains rich without any animal products.
Final Thoughts
This elderberry pie recipe has become one of my favorite seasonal desserts—a cozy, flavorful reminder of nature’s wonderful bounty. I love how this pie manages to be both simple and special, making it perfect for sharing around the table or savoring on a quiet evening at home. Give it a try and see how the unique tartness of elderberries, combined with buttery crust comfort, can turn a simple pie into a slice of joy. Trust me, your taste buds will thank you!
PrintElderberry Pie Recipe

This Elderberry Pie is a delightful, sweet-tart dessert featuring fresh elderberries enveloped in a flaky double-crust pastry. The combination of tender elderberries and a hint of lemon creates a perfectly balanced filling, thickened with cornstarch for a luscious texture. Ideal for berry lovers seeking a unique and visually stunning pie.
- Prep Time: 20 minutes
- Cook Time: 50 minutes
- Total Time: 1 hour 10 minutes
- Yield: 8 servings
- Category: Dessert
- Method: Baking
- Cuisine: American
Ingredients
Pie Crust
- 1 (14.1 ounce) package double-crust pie pastry, thawed
Filling
- 4 cups elderberries
- 1 cup white sugar
- 3 tablespoons cornstarch
- 1 tablespoon lemon juice
- 1 tablespoon butter, or to taste
- 1 tablespoon water, or as needed
Instructions
- Prepare the Pie Crust: Preheat your oven to 375°F (190°C). Roll out one of the pie crusts and fit it into a 9-inch pie plate, pressing gently to line the bottom and sides. Set aside.
- Make the Filling: In a large bowl, combine the elderberries, white sugar, cornstarch, and lemon juice. Mix gently until the berries are evenly coated. If the filling seems too thick, add water one tablespoon at a time until the mixture holds together but is not too watery.
- Fill the Pie: Pour the elderberry mixture into the prepared pie crust. Dot the top of the filling with small pieces of butter to add richness during baking.
- Top the Pie Crust: Roll out the second pie crust and place it over the filling. Trim and seal the edges by pressing with a fork or your fingers. Cut slits into the top crust to allow steam to escape while baking.
- Bake the Pie: Place the pie on the middle rack of the preheated oven. Bake for 45 to 50 minutes, or until the crust is golden brown and the filling is bubbly. If the edges brown too quickly, cover them with foil to prevent burning.
- Cool Before Serving: Remove the pie from the oven and let it cool on a wire rack for at least two hours. This cooling time allows the filling to thicken completely for clean slicing.
Notes
- Ensure elderberries are ripe and properly prepared; raw elderberries can be toxic if consumed in large amounts.
- Adding lemon juice brightens the flavor and balances the sweetness.
- Use cold butter and chilled pie dough for a flakier crust.
- Letting the pie cool fully before slicing enhances filling consistency.
- For a thicker filling, adjust cornstarch amount slightly depending on berry juiciness.