
Crusty Italian Bread Recipe
There’s something truly magical about baking your own Crusty Italian Bread Recipe at home—it’s like filling your kitchen with the aroma of a cozy Italian bakery. The crispy, golden crust paired with a soft, airy interior is what keeps me coming back to this recipe, especially when I want bread that’s perfect alongside a bowl of homemade soup or a charcuterie board for friends. If you’re looking for that unmistakable crust and tender crumb, this recipe delivers every time.
What I love most is how versatile it is. Whether you’re serving it fresh out of the oven or slicing it for sandwiches the next day, this Crusty Italian Bread Recipe offers a balance of flavor and texture that feels both indulgent and comforting. Plus, it’s surprisingly approachable—even if you’re new to bread baking, I’m going to walk you through it step-by-step.
Ingredients You’ll Need
The ingredients in this Crusty Italian Bread Recipe are pretty simple, but each one plays a key role. When you pick the right quality ingredients, especially the flour and yeast, it really shows in the final loaf.
- Bread flour: I always opt for bread flour because its higher protein content helps develop that perfect chewy crumb.
- Warm water: Just make sure it’s between 100-110°F to activate the yeast without killing it.
- Granulated sugar: This little bit of sugar feeds the yeast and encourages a good rise.
- Active dry yeast: Fresh yeast will give you the best lift – be sure it’s not expired!
- Butter: Room temperature butter adds a slight richness to the dough, keeping it tender.
- Salt: Essential for flavor and to control yeast growth—it’ll make your bread taste more rounded.
- Egg white: Used to brush on top for a gorgeous, shiny crust.
- Chilled water: Mixed with the egg white to thin it out for an even glaze.
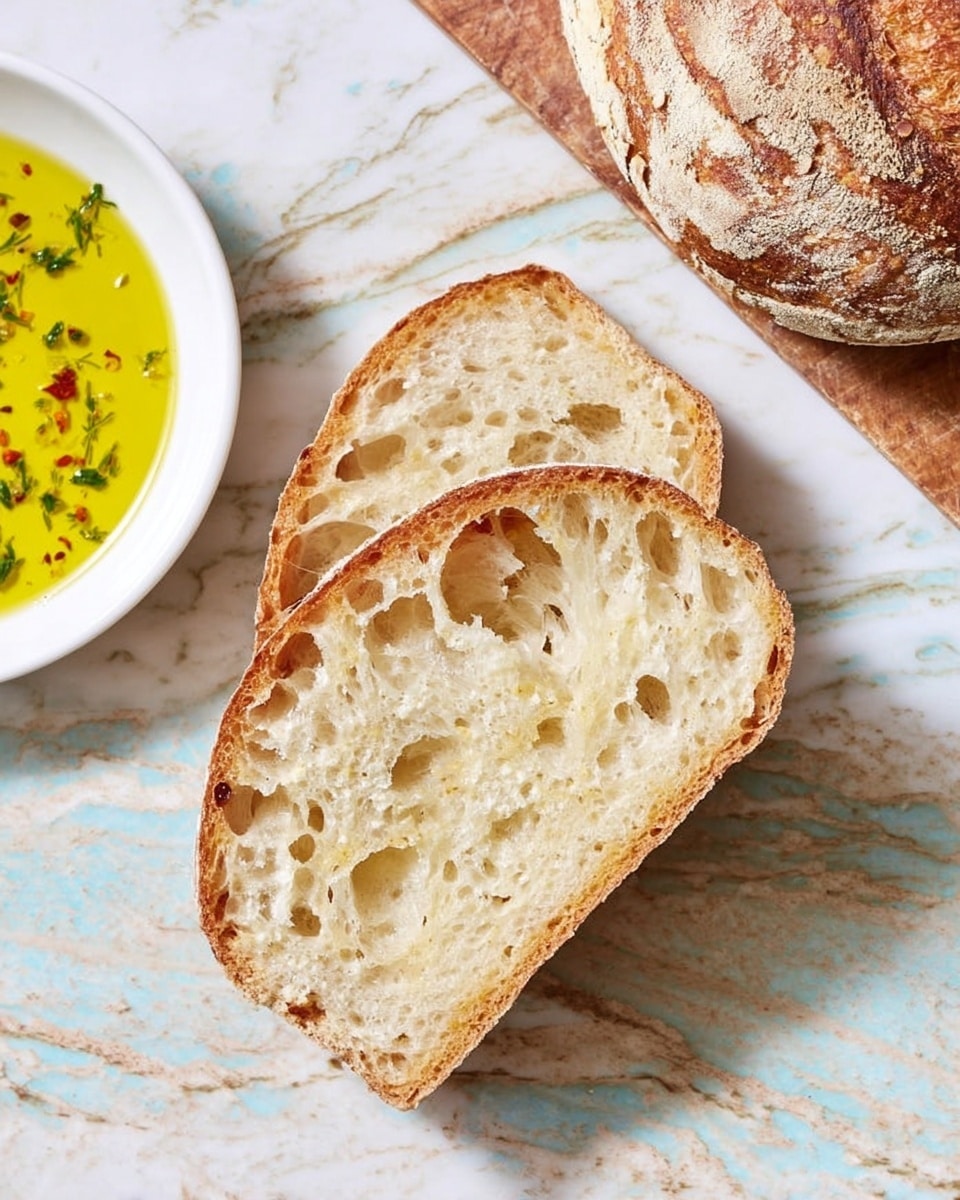
- Extra virgin olive oil: I love rubbing a little olive oil on the crust post-bake for added flavor and softness where you want it.
Variations
I like to play around with this Crusty Italian Bread Recipe depending on the season or what I have in the pantry. The beauty is that it’s so adaptable—you can tailor it to your mood or dietary needs without losing that classic Italian crustiness.
- Whole wheat blend: I’ve swapped half the bread flour for whole wheat flour to give it a nuttier flavor and more fiber—still crusty and just as satisfying.
- Herbs and garlic: Sometimes I mix in a tablespoon of dried rosemary or garlic powder for an herby twist that’s great alongside pasta dishes.
- Gluten-free alternative: If you need gluten-free, using a blend designed for bread and applying a bit more yeast helped me get a good rise, though the crust texture is a bit different.
- Overnight rise: For a deeper flavor, I let the dough proof slowly in the fridge overnight and then baked it fresh in the morning—it’s worth the wait.
How to Make Crusty Italian Bread Recipe
Step 1: Activate the yeast and prepare the dough
First up, pour your warm water into a large mixing bowl and stir in the granulated sugar and active dry yeast. Wait about 5-10 minutes until it gets foamy on top—that’s the yeast waking up and starting to bubble. This tells you it’s alive and ready. After that, add the bread flour, salt, and room temperature butter, then mix until you get a rough dough. I like to use my hands here because it helps me feel when the dough starts coming together.
Step 2: Knead until smooth and elastic
Transfer your dough to a floured surface and knead it for about 10-12 minutes. Your goal is a smooth, stretchy dough that’s not sticky. If it sticks to your hands, sprinkle on a little more flour but be careful not to overdo it or your bread will get too dense. When you gently poke the dough, it should spring back slowly—that’s your sign it’s ready.
Step 3: Let it rise until doubled
Place the dough in a lightly oiled bowl and cover with a damp cloth or plastic wrap. Find a warm spot and let it rise until it doubles in size, about 1 to 1 ½ hours depending on your kitchen’s temperature. I often use my oven light as a cozy little proofing box—it works like a charm.
Step 4: Shape and second rise
Once risen, punch the dough down gently to release air. Shape it into a classic loaf—either a round boule or a long baguette-style, whatever suits your mood. Place the shaped dough on a parchment-lined baking sheet, cover again, and let it rise for another 45 minutes. This second rise is crucial to getting that light texture inside.
Step 5: Prepare the crust and bake
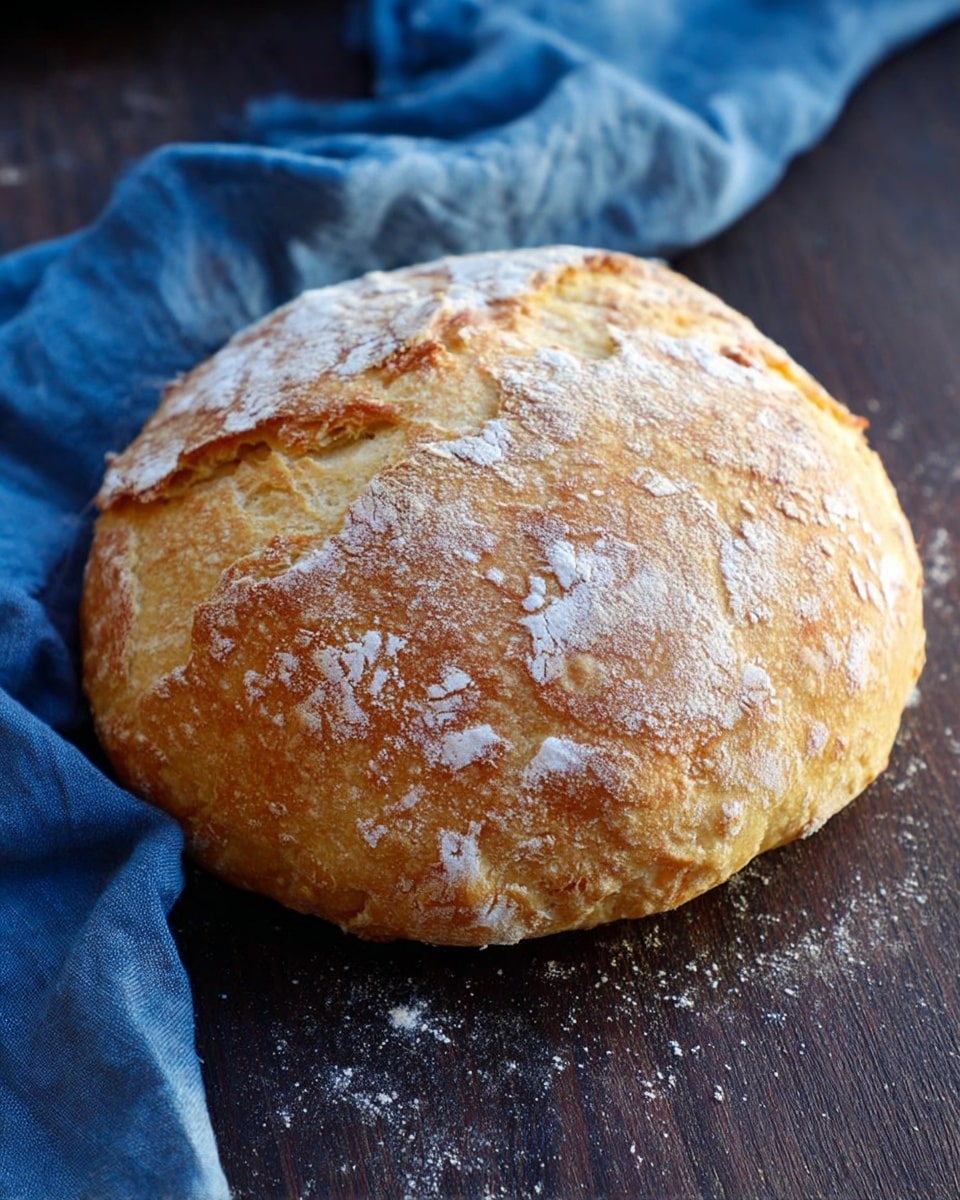
Right before baking, brush the top of your loaf lightly with the egg white mixed with chilled water. This gives the crust a beautiful sheen and that signature crunch. Slash the top with a sharp knife a few times—this helps the bread expand evenly while baking. Bake at 425°F (220°C) for about 25-30 minutes. You’ll know it’s done when the crust is deep golden brown and it sounds hollow when tapped on the bottom.
Step 6: Add finishing touches
When you take the bread out, while it’s still warm, brush the crust with extra virgin olive oil. This keeps certain areas softer while preserving the crispiness and adds a lovely flavor that’s so Italian. Let the bread cool on a rack so the inside sets perfectly before slicing.
How to Serve Crusty Italian Bread Recipe
Garnishes
I love sprinkling freshly chopped herbs like rosemary or basil on olive oil for dipping alongside this bread. Sometimes, a little flaky sea salt over the warm crust adds a satisfying pop of flavor. If you’re feeling fancy, a light drizzle of aged balsamic vinegar in your dipping oil combo is incredible.
Side Dishes
This bread pairs beautifully with classic Italian dishes like marinara-drenched pasta or a hearty minestrone soup. It’s also fantastic beside a cheese platter featuring sharp pecorino or creamy mozzarella. For a quick snack, just slice it thick, toast it, and swipe on fresh garlic and tomato—pure bliss.
Creative Ways to Present
For special dinners, I’ve carved the loaf into thick pieces and hollowed the inside a bit to make edible “bread bowls” for soups. Another fun idea is slicing it into rounds, toasting, and topping with bruschetta mix or whipped ricotta. It makes the bread part of the star appetizer rather than just a side.
Make Ahead and Storage
Storing Leftovers
I find the best way to store leftover Crusty Italian Bread Recipe is wrapped loosely in a linen cloth or paper bag at room temperature. This helps keep the crust crisp and prevents the bread from getting soggy. Avoid plastic here unless you want a soft crust the next day.
Freezing
Freezing works wonderfully for this bread. Slice it first and wrap individual slices in plastic wrap or foil, then place them in a freezer bag. That way you can toast them straight from frozen for quick breakfasts or snacks. I’ve done this many times and the results are just as tasty as fresh.
Reheating
To bring back that crusty, fresh-out-of-the-oven feeling, I heat slices or a whole loaf in a preheated oven at 350°F (175°C) for 5-10 minutes. Sprinkling a little water on the crust before warming helps steam it up so it’s crispy but soft inside. Microwave reheating just doesn’t cut it for this bread—it loses its charm fast.
FAQs
-
Can I use all-purpose flour for this Crusty Italian Bread Recipe?
While all-purpose flour can work in a pinch, bread flour is preferred because it has more protein, which helps develop gluten. This gives you that signature chewy texture and crust. If you use all-purpose, expect a softer crumb and possibly less rise.
-
How do I know when the bread is fully baked?
Look for a deep golden-brown crust and a hollow sound when you tap the bottom of the loaf. You can also use a thermometer; the internal temperature should reach around 190°F (88°C) for perfectly baked bread.
-
Is it necessary to use the egg white glaze?
The egg white glaze isn’t mandatory, but it really enhances the crust’s appearance and crispiness. If you’re avoiding eggs, you can brush the loaf with water or olive oil before baking for a more rustic finish.
-
Can I make this bread without a stand mixer?
Absolutely! This Crusty Italian Bread Recipe is perfectly suited for hand kneading. It might take a bit more elbow grease, but you’ll get great results and have a tactile connection to the dough that’s hard to beat.
-
How long does this bread keep fresh?
At room temperature, it’s best eaten within 2 days for optimal flavor and texture. After that, it will start to harden, so consider freezing any extras you want to keep longer.
Final Thoughts
Baking this Crusty Italian Bread Recipe has become one of my favorite kitchen rituals—it’s comforting, rewarding, and the smell alone is worth the effort. I encourage you to give it a try, especially if you’ve been intimidated by bread baking before. With a little patience and love, you’ll be slicing into a crusty, golden loaf that feels like a warm hug from an Italian grandma. Trust me, once you make it, you’ll want to bake it again and again.
PrintCrusty Italian Bread Recipe
This Crusty Italian Bread recipe yields a golden, crisp exterior with a soft, airy crumb inside. Using simple ingredients like bread flour, yeast, and olive oil, this homemade bread is perfect for sandwiches, dipping in olive oil, or accompanying your favorite Italian dishes. The process includes mixing, proofing, shaping, and baking to create an authentic Italian loaf with a delightful crust and chewy texture.
- Prep Time: 20 minutes
- Cook Time: 30 minutes
- Total Time: 2 hours 30 minutes
- Yield: 1 large loaf (about 12 servings)
- Category: Bread
- Method: Baking
- Cuisine: Italian
Ingredients
Dough Ingredients
- 650 grams bread flour (approximately 5 1/4 cups)
- 1 3/4 cups warm water (100-110°F)
- 1 tablespoon granulated sugar
- 1 tablespoon active dry yeast
- 1 tablespoon butter, room temperature
- 2 teaspoons salt
Egg Wash
- 1 egg white
- 1 tablespoon chilled water
Finishing
- 1 tablespoon extra virgin olive oil
Instructions
- Activate the Yeast: In a bowl, combine the warm water, granulated sugar, and active dry yeast. Stir gently and let it sit for about 5-10 minutes until it becomes frothy, indicating the yeast is active.
- Mix Ingredients: In a large mixing bowl, add the bread flour and salt. Add the activated yeast mixture and the room temperature butter. Mix until a rough dough forms.
- Knead the Dough: Turn the dough onto a floured surface and knead for about 10 minutes until it becomes smooth and elastic. Alternatively, use a stand mixer with a dough hook on medium speed for 6-8 minutes.
- First Proofing: Place the dough in a lightly greased bowl, cover with a clean kitchen towel or plastic wrap, and let it rise in a warm spot for about 1 to 1 1/2 hours or until doubled in size.
- Shape the Loaf: Gently punch down the dough to release air. Shape it into a long oval or round loaf, depending on your preference. Place it on a parchment-lined baking sheet or into a lightly greased bread pan.
- Second Proofing: Cover the shaped dough loosely and let it rise again for 30-45 minutes until puffy.
- Prepare Egg Wash: In a small bowl, whisk the egg white with chilled water. Brush this egg wash lightly over the surface of the dough to give the bread a beautiful shine after baking.
- Preheat Oven: Preheat your oven to 220°C (425°F). Place a shallow pan of water on the bottom rack of the oven to create steam, which helps form a crusty exterior.
- Score the Dough: Using a sharp knife or bread lame, make a few shallow slashes across the top of the loaf. This allows the bread to expand during baking.
- Bake: Bake the bread in the preheated oven for 25-30 minutes, or until the crust is golden brown and the loaf sounds hollow when tapped on the bottom.
- Cool and Finish: Remove the bread from the oven and immediately brush the top with extra virgin olive oil for flavor and softness. Allow the bread to cool completely on a wire rack before slicing.
Notes
- Ensure water temperature is between 100-110°F to properly activate yeast without killing it.
- Use bread flour for better gluten development and structure.
- Steam in the oven is essential for a crisp crust; placing a pan of water in the oven creates this effect.
- Allow bread to cool fully before slicing to avoid a gummy texture.
- Egg wash can be omitted for a more rustic, matte finish.